 Save
Save The first time I attempted a Rosé Velvet Cake, it wasn’t a planned experiment—it was an impromptu idea sparked by a bottle of rosé left over from a summer evening with friends. The kitchen was filled with the gentle fizz of the wine as it met the batter, and before I knew it, the whole space smelled delicately floral and a little bit mischievous. I laughed at my pink-streaked fingers from swirling in food coloring, worrying if it would end up a splashy mess or a showstopper. There’s something captivating about combining the elegance of wine with the comfort of velvet cake. This recipe is all blush tones and celebratory shimmer, and it always makes me feel like I’m part of something a bit magical when I bake it.
I once made this cake for my friend’s bridal shower on a drizzly afternoon—the windows were foggy, laughter echoed around the table, and when I sliced into that pale pink crumb, it was as if the sun came out just for us. The best part was watching everyone sneak back for tiny seconds, trying to leave the drip intact for photos just a little longer.
Ingredients
- All-purpose flour: Gives the cake structure—sift it for a more tender, lighter crumb.
- Granulated sugar: The sweetness balances the subtle acidity of the rosé.
- Baking soda and baking powder: Twin leaveners ensure the cake rises gently and evenly.
- Salt: Brings out all the other flavors, never skip it.
- Unsweetened cocoa powder: Just enough to deepen the flavor without losing the blush color.
- Unsalted butter: Let it come to room temperature for effortless creaming and a finer cake texture.
- Buttermilk: Its faint tang harmonizes perfectly with the floral notes from the wine.
- Rosé wine: Use a crisp, fruit-forward rosé for the most flavor—don’t bother with the expensive bottle!
- Eggs: Set them out an hour before baking for a smoother, silkier batter.
- Vanilla extract: Lends warmth and rounds out the flavors.
- White vinegar: Reacts with the leaveners to keep the cake extra tender.
- Pink food coloring gel: Add gradually—the color will intensify as it bakes.
- Cream cheese: For that rich, tangy frosting, soften it for the smoothest finish.
- Powdered sugar: Sift first to guarantee a lump-free, cloud-like frosting.
- Heavy cream: Helps the white chocolate drip glide smoothly over the cake’s edges.
- White chocolate chips: Melt gently to avoid seizing, for a glossy, even drip.
- Edible gold luster dust: The gold drip is pure visual joy—use a soft brush for the most even shine.
- Vodka or clear extract: Melts the luster dust into paint—vodka evaporates quickly, so you aren’t left with a boozy taste.
Tired of Takeout? 🥡
Get 10 meals you can make faster than delivery arrives. Seriously.
One email. No spam. Unsubscribe anytime.
Instructions
- Prepare your pans:
- Grease three 8-inch round cake pans and line the bases with parchment—your future self will thank you when the cakes glide right out.
- Sift and combine:
- Inhale the little puff of cocoa as you sift flour, cocoa, baking soda, baking powder, and salt together, making sure everything is feather-light and airy.
- Cream the butter and sugar:
- Beat butter and sugar together on medium speed until it looks pale and fluffy; this part always reminds me of creamy clouds forming in the mixing bowl.
- Add eggs and vanilla:
- Crack in the eggs one at a time, beating after each so the mixture stays silky, then drizzle in the vanilla.
- Mix in the liquids:
- Pour in the buttermilk, rosé wine, and vinegar while mixing on low; if the batter looks curdled, don’t panic—it’ll come together in the end.
- Color it blush:
- Swirl in pink gel food coloring bit by bit for a shade that suits your celebration—it should look a little brighter than you want, as it fades during baking.
- Bake:
- Split batter between the tins, smoothing the tops, then bake for 30–35 minutes—when your kitchen smells like warm chocolate and wine, check for doneness.
- Cool completely:
- Let cakes rest in their pans for 10 minutes before flipping onto wire racks; peel off the parchment and resist the urge to steal a corner.
- Make the frosting:
- Whip butter and cream cheese together until nearly mousse-like, sift in the powdered sugar, then blend in the rosé, vanilla, and a pinch of salt for a dreamy consistency.
- Assemble the layers:
- Level each cake layer if needed, then build your cake, stacking with frosting between layers and around the sides for a crumb coat; chill before applying the final smooth coat.
- Gold drip time:
- Melt white chocolate and heavy cream together in short bursts, stirring each time until glossy; let it cool to room temp, then drip down the edges with a spoon or bottle.
- Paint on the gold:
- Mix luster dust with vodka or extract to form paint, and gently brush it over the hardened drip—the transformation is always more stunning than you’d expect.
- Chill before serving:
- Pop the finished cake in the fridge for at least 30 minutes so everything sets, which will make slicing clean and photo-worthy.
 Save
Save  Save
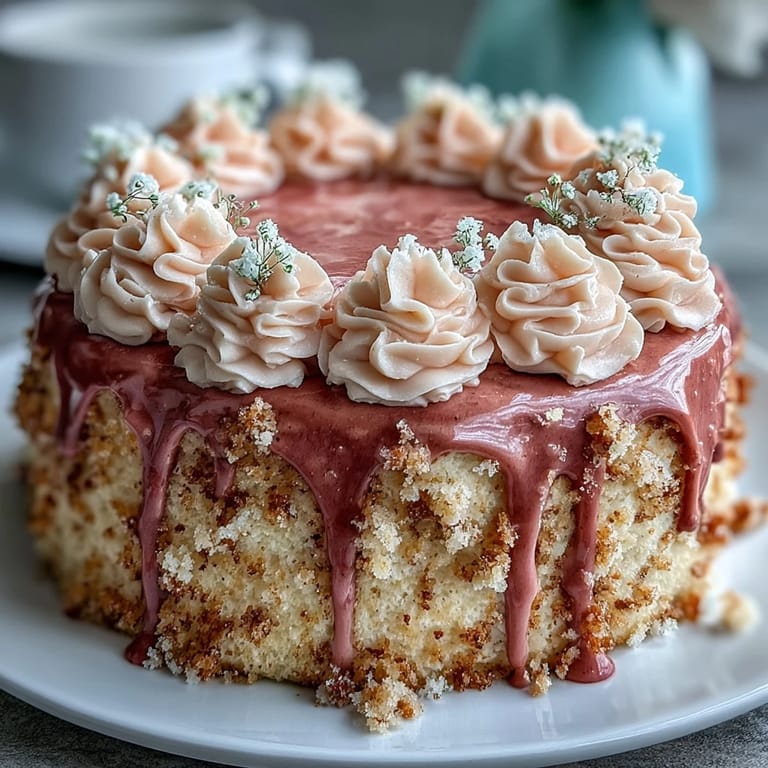
Save When my sister saw this cake gleaming at the center of our celebration table, her eyes lit up brighter than the candles. In that moment, the cake was so much more than dessert—it became a centerpiece for joy, laughter, and new memories to come.
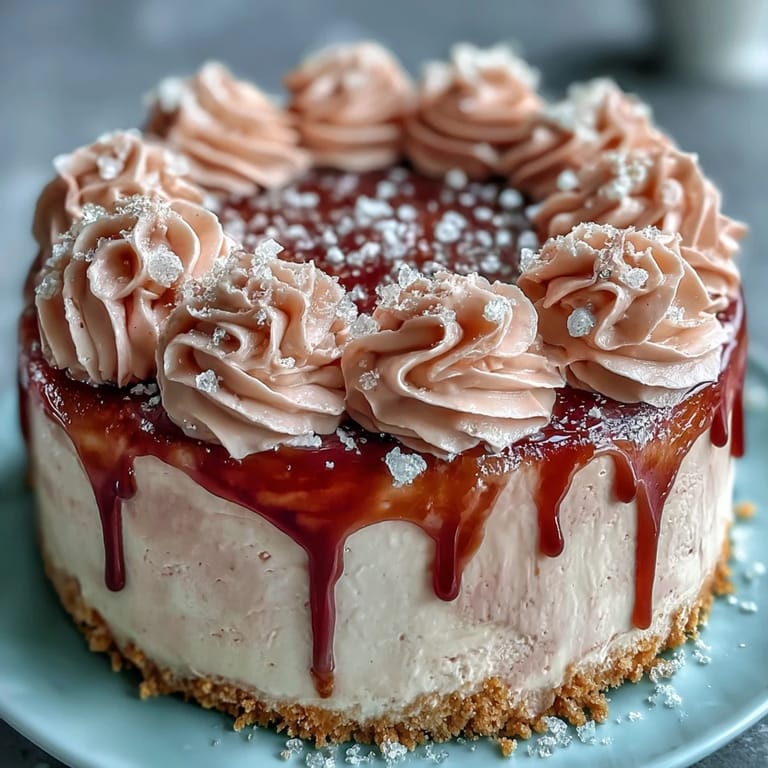
How to Make Your Gold Drip Shine
Getting that flawless gold drip always feels a bit intimidating, but it’s all about patience and timing. Wait until the white chocolate has cooled just enough to thicken, but is still pourable—that way it clings beautifully and doesn’t run off the cake completely. Use a food-safe paintbrush for the gold and try not to worry about perfection; the little imperfections just make it special.
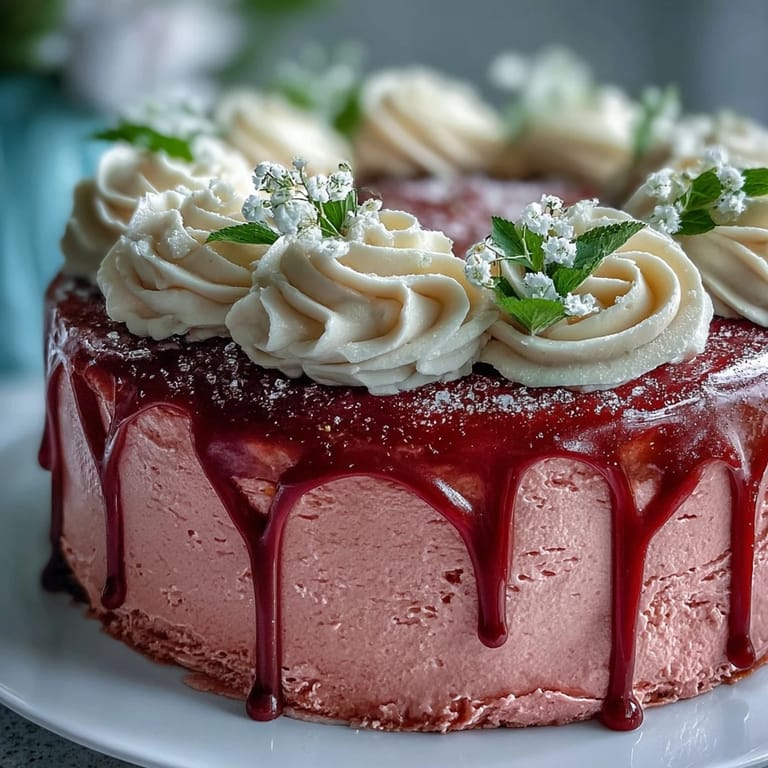
Decorating With Drama: Edible Flowers and More
If you want people to pause in awe, scatter a few edible flowers or tuck in some fresh berries before serving. I once used tiny pansies from the garden and the effect was like cake couture. Gold leaf here and there just adds to the magic, but I promise, even a simple finish looks stunning when that gold drip glows.
Troubleshooting Cake Layers (Because Real Life Happens)
Some days, the layers might dome up or stick a little. Don’t stress: use a serrated knife to level them—it’s a baker’s rite of passage. If the cake crumbles, press it back together gently with extra frosting—honestly, no one has ever noticed in a room full of friends.
- Chill layers before frosting for the smoothest finish.
- Stick parchment between cake and stand to catch drips, then slide it out before serving.
- Let the cake come to room temperature for best flavor and texture.
 Save
Save  Save
Save I hope this Rosé Velvet Cake brings as many sparkling moments to your table as it has to mine—don’t wait for a big event, any day can be a celebration with a cake this beautiful.
Recipe FAQ
- → How can I boost the rosé flavor?
Brush cooled layers lightly with reserved rosé before assembling, or fold a tablespoon more rosé into the frosting to intensify the wine note without thinning the texture.
- → What non-alcoholic swap works best?
Use sparkling grape juice in place of rosé for a similar flavor and sweetness; reduce other liquid slightly if the batter seems loose.
- → How do I get an even blush color?
Use a concentrated gel food coloring and add it a little at a time until you reach the desired shade; mixing briefly avoids streaks while maintaining lift in the batter.
- → Tips for a stable cream cheese frosting?
Beat softened butter and cream cheese until smooth, add sifted powdered sugar gradually, and chill briefly before frosting to firm it up; avoid overbeating to prevent looseness.
- → How do I create and apply the gold drip?
Make a white-chocolate ganache with chocolate and cream, cool to a pipeable temperature, drip from the edge with a spoon or squeeze bottle, then paint the set drip with edible gold luster dust mixed with a touch of vodka or clear extract.
- → How should I store and serve the cake?
Refrigerate covered for up to 2–3 days. Bring to room temperature 30–60 minutes before serving for optimal texture and flavor; chill briefly after decorating to set the drip.