 Save
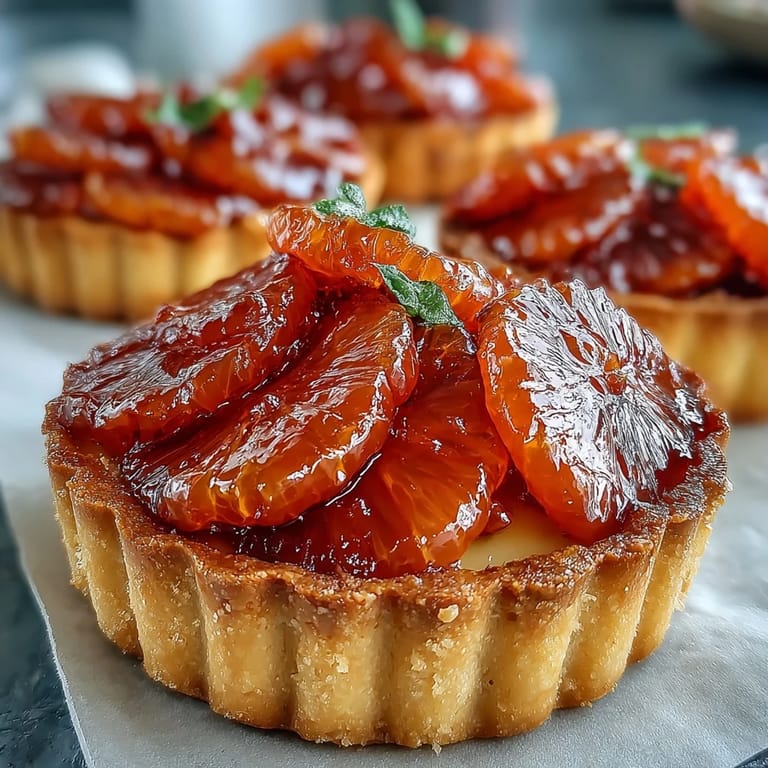
Save There's something about blood oranges that catches you off guard—that deep crimson flesh against the pale skin feels almost theatrical. I found myself staring at them in the market one winter morning, imagining how stunning they'd look nestled on top of a custard tart, and suddenly the whole dessert came together in my mind. These individual tarts became my answer to wanting something elegant but not fussy, something that looks like you've spent all day in the kitchen when really you've just been strategic about timing. The crisp shells, silky vanilla custard, and those jewel-toned citrus slices create a moment of real beauty on the plate.
I made these for my sister's birthday dinner after she'd spent weeks talking about wanting something "not chocolate but still exciting." Watching her eyes light up when she saw the deep red orange slices arranged on top was worth every minute of chilling time. Her friend asked for the recipe before she'd even finished her first bite, which felt like the ultimate compliment.
Ingredients
- All-purpose flour (1 1/4 cups): This is your tart shell foundation, and measuring by weight rather than volume keeps you from compacting it too much into the measuring cup.
- Powdered sugar (1/4 cup): The fine texture dissolves into the dough and adds subtle sweetness without the grittiness of granulated sugar in pastry.
- Unsalted butter, cold and cubed (1/2 cup): Cold butter is non-negotiable here—it's what creates those flaky layers when it melts during baking.
- Large egg yolk (1): Just the yolk acts as a binder and adds richness without toughening the dough like whole eggs would.
- Ice water (1–2 tbsp): Add it gradually and stop the moment the dough comes together to avoid overworking the gluten.
- Salt (pinch): A small amount brings out the butter flavor and balances the sweetness.
- Whole milk (1 1/4 cups): Full-fat milk creates a richer custard with better texture than lower-fat versions.
- Granulated sugar (1/3 cup): This sweetens the custard and is whisked with yolks to prevent the eggs from scrambling when hot milk hits them.
- Egg yolks (3): These create the custard's silky texture and golden color—this is where the richness lives.
- Cornstarch (2 tbsp): This thickens the custard without making it rubbery, giving it that glossy, spoonable consistency.
- Pure vanilla extract (1 tsp): Avoid imitation vanilla here—the real stuff makes a noticeable difference in the final flavor.
- Unsalted butter (1 tbsp): Swirled in at the end, this adds silkiness and a subtle richness to the finished custard.
- Blood oranges (3–4): Choose ones that feel heavy for their size, which means they're juicy; the deep red ones are usually more dramatic than those with lighter streaks.
- Honey (1 tbsp, optional): If you use it for glazing, it creates a glossy finish and prevents the orange from drying out slightly during chilling.
Tired of Takeout? 🥡
Get 10 meals you can make faster than delivery arrives. Seriously.
One email. No spam. Unsubscribe anytime.
Instructions
- Build your tart dough:
- Pulse the flour, powdered sugar, and salt together in a food processor until combined, then add your cold butter cubes and pulse until it looks like coarse breadcrumbs—this takes about 10–15 pulses. Add the egg yolk, pulse once or twice, then add ice water one tablespoon at a time while pulsing just until the dough comes together into a shaggy mass.
- Chill the dough:
- Shape the dough into a flat disk, wrap it tightly in plastic wrap, and let it rest in the refrigerator for at least an hour (or even overnight). This resting time lets the gluten relax and the flour fully hydrate, which makes rolling much easier and prevents the shells from shrinking during baking.
- Shape and chill again:
- Roll the dough out on a lightly floured surface to about 1/8-inch thickness, then cut circles slightly larger than your tart pan openings and press gently into the pans. Trim the excess dough and chill these lined pans for 20 minutes so the dough won't puff up unevenly during baking.
- Blind bake the shells:
- Preheat your oven to 350°F and line each tart shell with a small square of parchment paper, then fill with pie weights (or dried beans in a pinch). Bake for 15 minutes until the edges are just starting to turn golden, remove the weights and parchment, then bake for another 5 minutes until the bottoms are light golden. This prevents soggy shells and ensures they stay crisp even with the custard inside.
- Make the custard base:
- Heat the milk in a saucepan until it's steaming (don't let it boil), then in a separate bowl whisk together the egg yolks, granulated sugar, and cornstarch until the mixture is pale and ribbony. This step is crucial because the sugar granules help protect the yolks from scrambling when the hot milk hits them.
- Combine milk and eggs safely:
- Slowly drizzle the hot milk into the egg mixture while whisking constantly—this tempering process prevents the eggs from cooking into scrambled bits. Once the egg mixture is warm, pour the whole thing back into the saucepan and cook over medium heat, whisking constantly, until the custard thickens and you see a few gentle bubbles breaking the surface, about 2–3 minutes.
- Finish the custard:
- Remove the saucepan from the heat and stir in the vanilla extract and butter, letting the residual heat melt the butter completely. Transfer the custard to a bowl, press plastic wrap directly onto the surface to prevent a skin from forming, and let it cool to room temperature before chilling for at least an hour.
- Assemble your tarts:
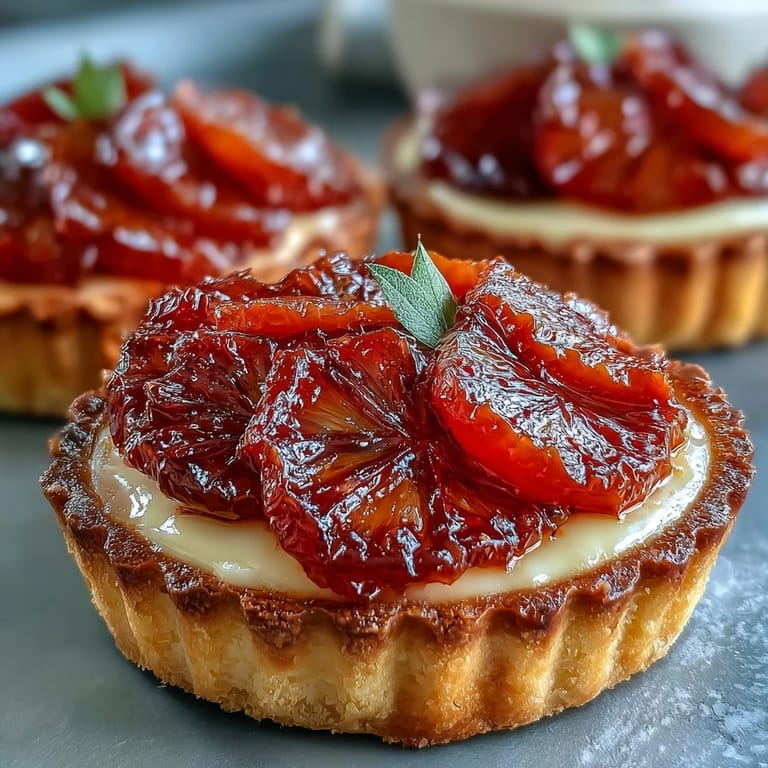
- Spoon the chilled custard into the cooled tart shells, dividing it evenly among them, then arrange overlapping slices of blood orange on top in a casual, artful pattern. If you're using the honey glaze, warm 1 tablespoon honey with 1 teaspoon water until it's thin and brushable, then gently brush it over the orange slices for a subtle shine.
- Final chill:
- Return the assembled tarts to the refrigerator until you're ready to serve them, which also allows the flavors to meld together beautifully.
 Save
Save What made these tarts special wasn't just how they tasted—it was the moment my friend asked if I'd made them for her wedding next summer. That conversation happened over dessert, which somehow felt like the highest compliment a cook can get.
The Magic of Blood Oranges
Blood oranges have this theatrical quality that makes people pause before they eat them. The deep crimson flesh feels almost luxurious compared to regular oranges, and their flavor is slightly more complex with subtle berry notes underneath the citrus. They're more delicate than regular oranges, so handle them gently when slicing and use them within a day or two of peeling for the best appearance and texture.
Timing Your Assembly
The real secret to these tarts is understanding that you can make everything ahead but should assemble them close to serving time. The custard can wait in the fridge for a day, the shells stay crisp for a few hours once they've cooled, but the moment the orange slices sit on top, they start to weep slightly into the custard. This isn't a disaster—it actually softens and mingles beautifully—but if you want maximum crispness in the shell, assemble within two hours of serving.
Customizing Your Flavor
Once you master the basic version, these tarts become a canvas for your own ideas. A whisper of orange zest stirred into the custard amplifies the citrus theme, while a tiny pinch of cardamom adds unexpected warmth without overpowering anything. You could even brush the shells with a thin layer of melted dark chocolate before filling them if you want richness and contrast.
- Orange zest: Add it to the custard mixture just before it goes into the fridge for a brighter, more pronounced citrus flavor.
- Substitutions: Regular oranges, grapefruit, or even pomelo segments work beautifully if blood oranges aren't available.
- Make ahead strategy: Shells stay crisp for 6 hours, custard keeps for 2 days, but assemble the tarts within 2 hours of serving for best texture.
 Save
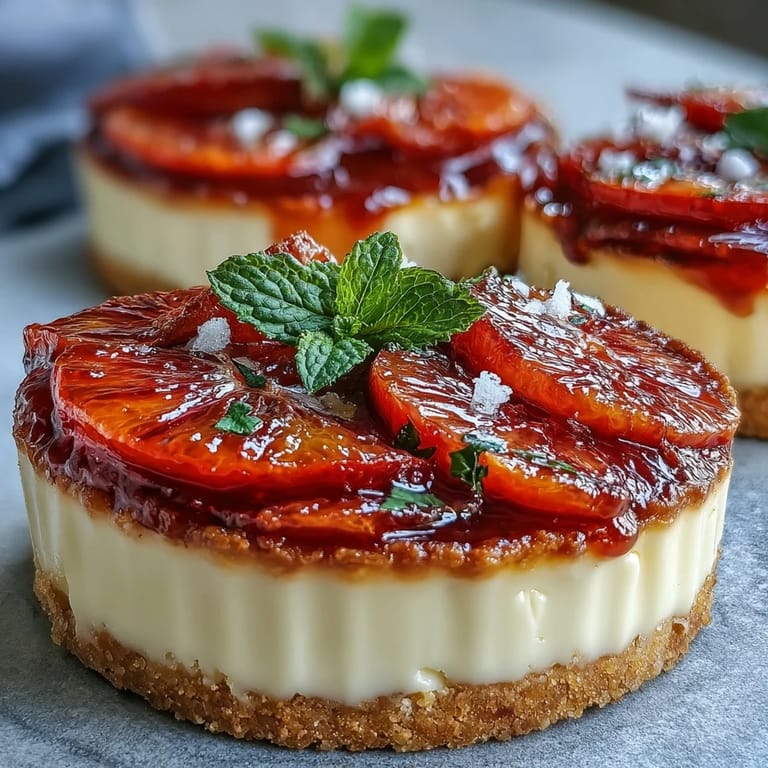
Save These tarts are the dessert you make when you want to feel proud of what you've created but also want the evening to be about the people you're sharing it with, not stressed kitchen time. They sit on the plate like little jeweled promises that dessert can be both beautiful and delicious.
Recipe FAQ
- → Can I make these tarts ahead of time?
Yes, you can prepare the tart shells and custard a day in advance. Store them separately in the refrigerator and assemble with fresh blood orange slices just before serving to maintain the best texture and presentation.
- → What can I substitute for blood oranges?
Regular oranges, cara cara oranges, or even grapefruit work well as substitutes. While you'll lose the dramatic red color, the tarts will still be delicious with any citrus variety you choose.
- → How do I prevent the tart shells from shrinking?
Chilling the dough twice is key—once after forming the disk and again after pressing into the pans. This relaxes the gluten and helps maintain the shape during baking. Using pie weights also prevents puffing and shrinking.
- → Can I use store-bought tart shells?
Absolutely. Store-bought shells save time and still produce a delicious dessert. Just bake according to package directions, cool completely, then fill with the homemade custard and top with blood oranges.
- → How long will these tarts stay fresh?
Assembled tarts are best enjoyed within 24 hours. The custard and shells can be stored separately for up to 2 days in the refrigerator, allowing you to assemble fresh tarts as needed.
- → What wine pairs well with blood orange tarts?
A sparkling rosé, Moscato d'Asti, or late-harvest Riesling complement the citrus and vanilla flavors beautifully. The slight sweetness and acidity in these wines balance the richness of the custard.