 Save
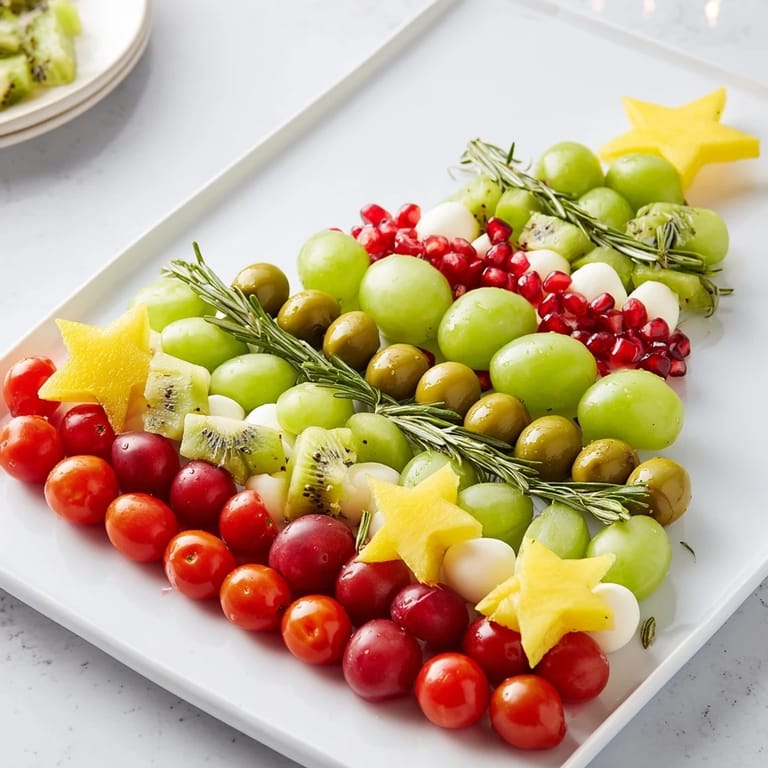
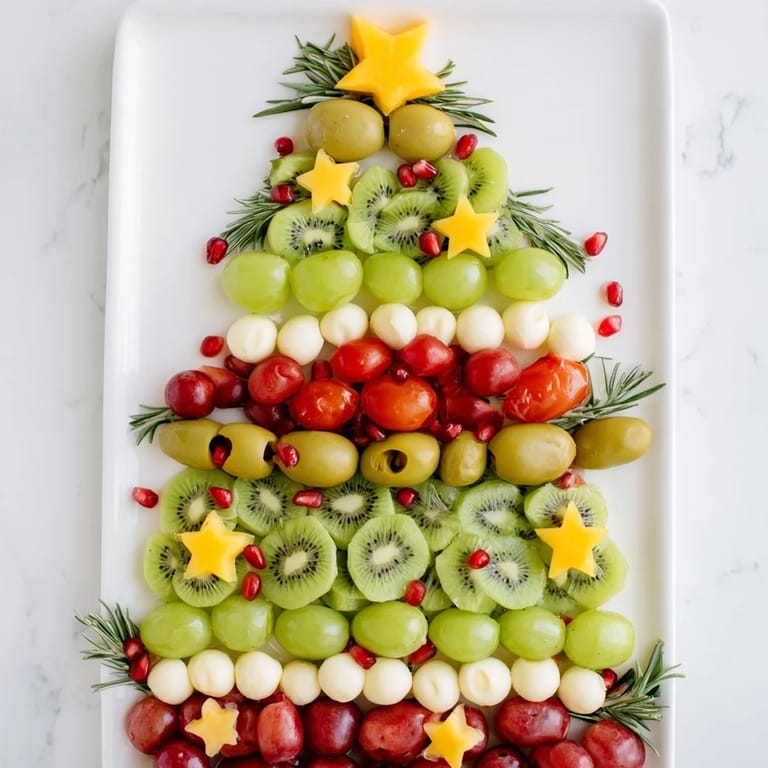
Save I'll never forget the year my sister suggested we skip the traditional charcuterie board and create something that would actually wow our guests as soon as they walked through the door. It was December, and I was standing in my kitchen, staring at a beautiful array of green grapes, jewel-toned olives, and vibrant kiwi slices when it hit me: what if we arranged it all into the shape of a Christmas tree? Within minutes, I was building this edible masterpiece on a wooden board, layering the colors like I was painting a holiday landscape. The result wasn't just food anymore, it was a conversation starter, a centerpiece, and honestly, one of the most beautiful things I'd ever arranged in my kitchen.
That first holiday party when I unveiled this tree board, I watched my mom's face light up in that way that made all the fussing worthwhile. She walked straight over and started picking grapes before anything else was even set out, and suddenly everyone was gathered around, plucking pomegranate seeds and mozzarella balls like they were opening presents. I realized then that the magic wasn't just in the flavors, it was in how something beautiful makes people slow down and actually enjoy each other's company.
Ingredients
- Green grapes (2 cups): These form your tree's main body and foundation. I always wash and completely dry them because water droplets make everything slide around on the board. They're slightly less sweet than red grapes, which keeps the overall platter from feeling cloying.
- Green olives (2 cups, pitted): This is where the savory note comes in, and honestly, it's the secret that makes people come back for more. The briny flavor grounds all that sweetness from the fruit. Buy pitted olives if they're available, because removing pits by hand is absolutely worth skipping.
- Kiwi slices (3 large, peeled): The vivid green color and slight tartness are essential. Slice them into thin rounds just before arranging, and don't peel them too far ahead or they'll start oxidizing and looking tired.
- Cherry tomatoes (1/2 cup, halved): These serve as your red ornaments and add a little juice and freshness that cuts through the richness. Halving them keeps them from rolling around.
- Red grapes (1/2 cup, halved): These scattered throughout add pops of ruby color and a burst of sweetness. Don't halve them until you're ready to arrange, or they'll weep.
- Mozzarella balls (1/2 cup): These little bocconcini are like edible Christmas lights. They're creamy, mild, and add a texture contrast that makes the board feel more sophisticated. Keep them cold right until serving.
- Pomegranate seeds (1/4 cup): These jewels are your sparkle. Yes, they're a bit of work to extract, but they're worth it for both the color and the way they burst in your mouth. Open the pomegranate over a bowl of water to avoid staining your hands.
- Yellow bell pepper stars (1 small pepper): A small star-shaped cookie cutter transforms ordinary pepper slices into a tree topper that feels genuinely festive. This detail absolutely justifies the small effort.
- Fresh rosemary sprigs: These are your pine needles, and they make the tree actually look real from across the room. They also smell incredible, which engages another sense entirely.
Tired of Takeout? 🥡
Get 10 meals you can make faster than delivery arrives. Seriously.
One email. No spam. Unsubscribe anytime.
Instructions
- Start with your foundation:
- Place your large wooden board in front of you and imagine drawing a triangle on it. Begin at the base with your widest row, alternating green grapes and green olives in a line. Make sure everything is completely dry so it sits stable and doesn't slip as you build upward. This is where patience pays off, so take your time.
- Build the tree layers:
- Move up toward the apex, creating rows that get progressively smaller. Alternate your green base ingredients to create visual rhythm. You're building something that needs to look intentional and beautiful, so leave small gaps between items rather than cramming everything together. Each layer should be visible and distinct.
- Tuck in the pine needles:
- As you work, slide fresh rosemary sprigs into the gaps and between layers. They should peek out like evergreen branches, and you'll notice immediately how much more realistic and forest-like the whole thing looks.
- Add your ornaments:
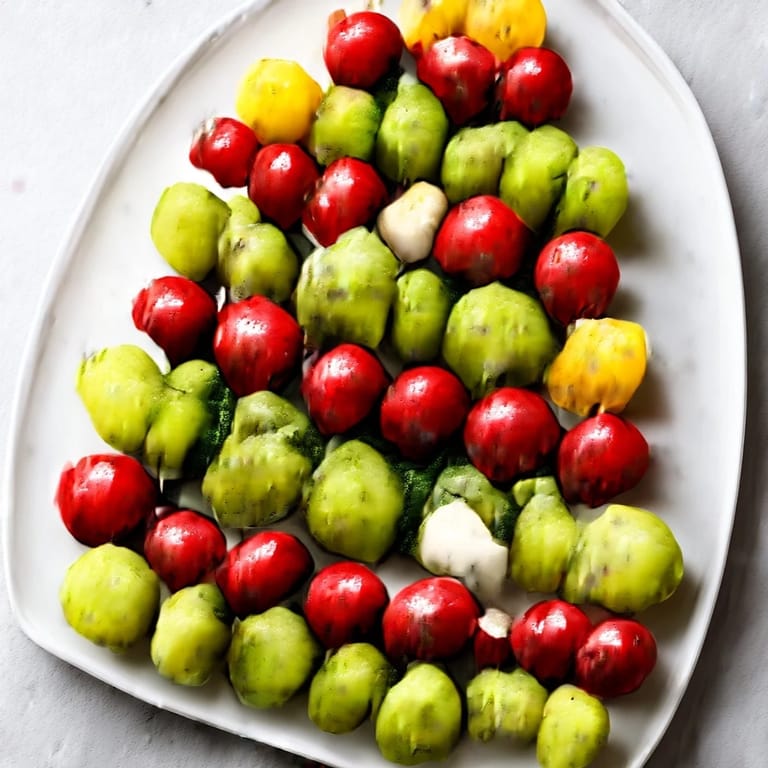
- Now comes the fun part. Scatter your cherry tomatoes, red grapes, mozzarella balls, and pomegranate seeds across the tree like you're hanging ornaments on an actual Christmas tree. Don't overthink placement, just distribute them so colors are balanced throughout. The mozzarella should stay toward the center where it's cool and visible.
- Crown it with stars:
- Place your yellow bell pepper stars at the very top to create a tree topper moment. If you have extra stars, scatter a few along the sides for extra festive flair. This is where your board becomes a photograph.
- Present with intention:
- Serve immediately so everything is crisp and cold. Set out crackers or sliced baguette on the side, though honestly, most people reach straight for the board itself.
 Save
Save Last December, my neighbor stopped by unexpectedly and saw this board sitting on my kitchen counter. She stayed for nearly an hour just talking and snacking, and I realized that something beautiful doesn't just feed the body, it feeds the whole gathering. We weren't just eating fruit and olives, we were celebrating together, and somehow this board made that feel intentional.
Making It Vegan or Dairy-Free
The only animal product here is the mozzarella, and honestly, it's the easiest thing to work around. If you're serving vegan guests, simply omit the mozzarella balls or replace them with vegan cheese alternatives. Some vegan cheeses get a little soft at room temperature, so keep them chilled and add them right before serving. Your tree loses nothing in terms of beauty or flavor, and everyone at the table feels welcomed.
Beyond the Basics
Once you master the basic tree shape, this is your playground. I've added crisp cucumber slices for extra crunch, thin apple wedges for another layer of sweetness and tartness, and even radish slices for a peppery kick and stunning red color. Some years I add yellow cherry tomatoes because they photograph like tiny edible lights. The formula stays the same, but your creativity matters. Trust your instincts about what flavors and colors speak to your celebration.
Pairing and Serving Tips
This is the kind of board that works at any gathering, from casual December hangouts to more formal holiday parties. The flavors are bright and don't feel heavy, so they pair beautifully with crisp white wines, sparkling water with a lime wedge, or even light holiday cocktails. Your guests can graze for hours, and the board actually gets more visually interesting as people eat, revealing new patterns underneath.
- Keep the board at room temperature for about 30 minutes before serving if you want the mozzarella to be creamy rather than dense and cold
- If you're traveling with this board, keep it flat and secure it gently with plastic wrap, then unwrap right before presenting to preserve the arrangement
- Always double-check olives for any remaining pits before serving, even if the label says they're pitted, because one rogue pit is not the holiday memory anyone wants
 Save
Save This board is proof that the most memorable dishes don't need hours of cooking, just thoughtfulness and a little bit of color. Every time I make it, someone asks for the recipe, and I love telling them there is none, just an idea and whatever beautiful things are at the market that week.
Recipe FAQ
- → What fruits are used to create the layers?
Green grapes, green olives, and sliced kiwis are alternated to form the layers of this festive board.
- → How can I create the pine needle effect?
Fresh rosemary sprigs are tucked between layers to resemble pine needles on the triangle board.
- → What toppings add color and texture to the presentation?
Cherry tomatoes, red grapes, small mozzarella balls, and pomegranate seeds are scattered over the layers as vibrant ornaments.
- → How are the yellow bell pepper stars made?
A small star-shaped cookie cutter is used to cut yellow bell pepper pieces into star shapes placed on top and throughout the board.
- → Can this be made vegan-friendly?
Omit the mozzarella balls or substitute with vegan cheese to suit a vegan diet without sacrificing flavor.
- → What serving options complement this board?
Serve with crackers or sliced baguette on the side to add texture and make it easy to enjoy the spread.